DIY Paver Patio: A Budget-Friendly Backyard Upgrade
Learn how to build your own DIY Paver Patio with this easy to follow tutorial that will transform your backyard on a budget.

Creating a beautiful and functional backyard doesn’t have to break the bank. For families new to home DIY projects, building a paver patio is an achievable and rewarding way to transform your outdoor space into a cozy retreat.
In this step-by-step guide, we’ll walk you through the planning, materials, and installation process—perfect for beginners on a budget who still want backyard charm. Our family was able to completely transform our patio in just one day with this technique. We’ll also explore patio ideas like adding a backyard fire pit or a connecting paver walkway.
Note: Some links may be affiliate links. That means I may make a commission if you use my links to purchase, at no extra added cost to you! I only recommend products that I personally love and believe in. Full disclaimer here.

Why Choose a DIY Paver Patio?
Paver patios are affordable, durable, and customizable. Whether you’re hosting family BBQs, watching the kids play, or just enjoying some quiet outdoor time, a paver patio adds comfort and value to your home.
Doing it yourself can save hundreds—if not thousands—of dollars on installation costs. Plus, there are a variety of patio stones and styles available, from traditional concrete to premium options.
We opted to create a patio makeover using 12″x12″ concrete pavers. These are the traditional square pavers most of us imagine for projects like this. I was able to get over 100 from our local buy nothing group for free, so we decided to use them for this easy DIY project.
Planning Your Paver Patio
1. Determine the Purpose and Size
First, think about how you’ll use your patio. Dining area? Lounge space? Fire pit gathering spot? This will help you decide on the right size.
Use a rope or mason’s line to outline your space in the yard and visualize the layout. Consider a large area if you plan to host or want to incorporate features like a backyard fire pit or retaining wall.
For us, we chose just to pave an existing area we normally have a dining table set up. It’s the perfect way to elevate this space.
2. Choose the Right Location
Pick a flat surface that’s easily accessible and gets a good mix of sun and shade. Stay close to your house for convenience, especially if you’ll use it for dining or entertaining.
We chose to build our DIY paver patio directly next to an existing concrete patio pad. This made it easy for us to measure the space and make an even patio.
3. Select the Right Materials
Concrete patio stones or DIY patio pavers are beginner- and budget-friendly. They come in many shapes and colors. They can be found at local garden centers or home improvement stores, with many affordable options that match your style.
Not sure how many pavers you need? Use a paver calculator online to determine the exact quantity based on your patio dimensions and layout.

What You’ll Need for a DIY Paver Patio
Ready to start planning your own budget paver patio? Here’s what you’ll need for this surprisingly easy DIY project:
Materials Needed to Make a DIY Paver Patio:
- Concrete patio pavers (12″x12″)
- Paver base materials (crushed stone or gravel) or Paver sand (coarse bedding sand)
- Pea gravel for gap filler
- Edging restraints (optional)
- Landscape fabric (optional)
Suggested Tools:
- Shovel
- Rake
- Wheelbarrow
- Tape measure
- Level
- Rubber mallet
- Plate compactor or hand tamper
- Broom
- Mason’s line and stakes
Step-by-Step: How to Build a Paver Patio
Proper prep work is essential. Skipping steps can lead to uneven pavers and poor drainage. Here’s what you need:
Step 1: Prepare the Area
Clear the grass and topsoil from the marked area. Dig down 2-4 inches to allow room for the paver base materials, sand, and pavers. Rake the entire area and ensure it’s a flat surface.

Step 2: Lay the Base Layer
Lay landscape fabric if you want to reduce weeds. While optional, this will help minimize weeds popping through in between the pavers.

Step 3: Add the Sand Layer
Pour 1-2 inches of paver sand over the compacted base and level it with a screed board or 2×4. This cushions the pavers and helps them stay level. This is a crucial prep work step to ensure a stable foundation.

Step 4: Lay the Pavers
Start in one corner and place your DIY patio pavers using your mason’s line as a guide. Tap each one with a mallet and leave small, even gaps between them. Keep checking for level as you go.

Step 5: Install the Edging
If desired, add edging restraints along the border to keep everything in place. Secure them with spikes.
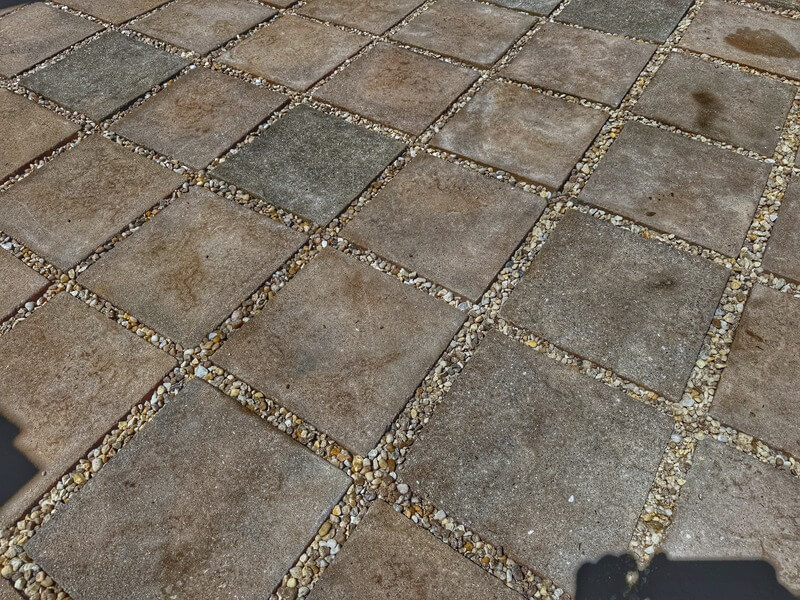
Step 6: Fill the Joints
Spread pea pebbles or other tiny stones over the patio and sweep it into the joints. Compact the patio again and repeat until joints are full. This locks your pavers in place.

Step 7: Enjoy your new patio
Give your patio a quick spray down. Set up your furniture over your beautiful new space and enjoy!
DIY Paver Patio Cost
One of the biggest questions we’ve received about this project is the cost of our DIY paver patio. The number 1 reason we chose to do it yourself for this project was because it saved so much money.
Here is the breakdown of what we spent:
- Concrete patio pavers: Our patio is 9×8, so we used 72 12″x12″ concrete pavers. These are available at Home Depot for about $2 each, making this $144 total if we had purchased them.
- Paver base materials: We used 5 bags of paver sand at about $6 each, for a total of $30.
- Gap filler materials: We used pea pebbles, and purchased 5 bags for about $6 a bag for a total of $30.
- Landscape fabric: We already had this on hand, but a roll can be purchased from Home Depot for as little as $25 for a project this size. How much you will need depends on the size of your space.
- Total cost if you need to purchase everything: $229.

Expert Tips and Patio Ideas
Keep your DIY paver patio looking good for years to come with these expert tips:
- Install a paver walkway connecting your patio to a garden or driveway.
- Design a backyard fire pit area for cozy nights outside.
- Include a retaining wall to define the space or double as seating.
- Sweep regularly to remove debris and prevent moss buildup.
- Top up joint sand yearly, if needed.
- Seal your pavers to help prevent stains and weather damage.

You might also enjoy these DIY Home Projects:
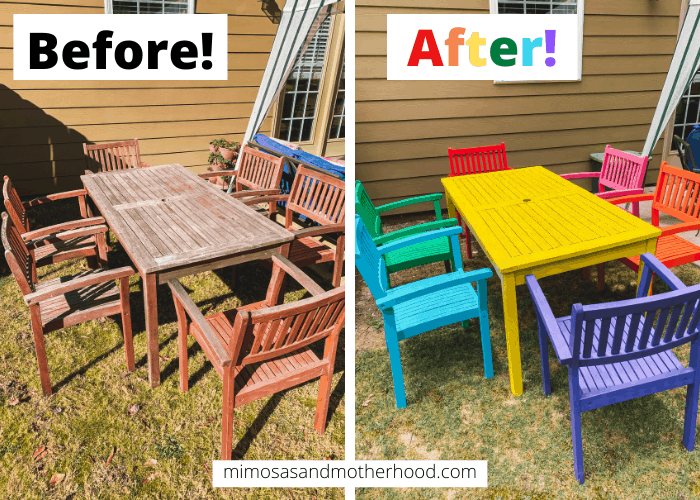
Rainbow Wooden Outdoor Patio Furniture Makeover with Spray Paint
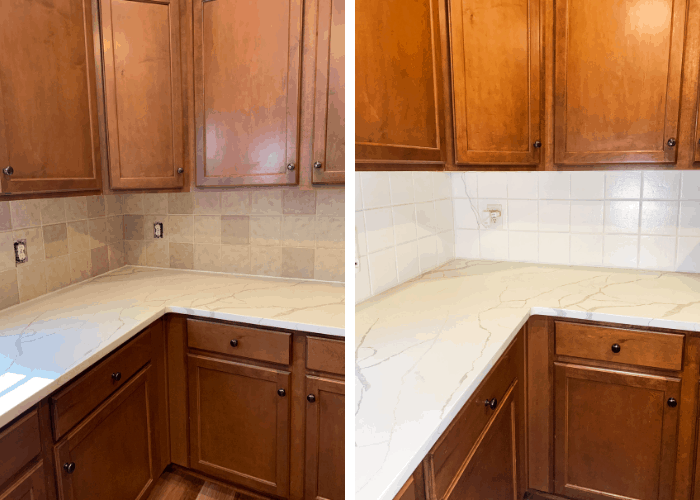
How to Paint a Kitchen Tile Backsplash
Final Thoughts on Building Your Own Paver Patio
With a little patience and the right materials, building a DIY paver patio is one of the most budget-friendly outdoor upgrades you can take on as a family. Whether you’re creating a new dining space, a kid-friendly zone, or a quiet retreat, this project transforms your yard into a space you’ll enjoy every season. It’s also a project the entire family can help with!
Use a paver calculator to ensure you purchase the correct amount of materials, and take your time during prep work to avoid future headaches. Don’t forget to explore other patio ideas to make your design truly your own.
Ready to take the next step? Head to your local home improvement store, grab your tools, and start laying the foundation for your perfect backyard escape!
If you enjoyed this DIY project, be sure to pin it on Pinterest using the image below to make it easier to find next time!