Cloth Diapering 101: How to Start Cloth Diapering
Interested in cloth diapering? Learn the basics of cloth diapering 101! Read on for everything you need to know about cloth diapering, from how to get started, how to clean cloth diapers and how to make the process as easy (and fun!) as possible.
I remember when we were expecting and I shared with friends and family that we planned on cloth diapering. About 80% of the time we were met with the same response: “Oh, that’s so cute, but everyone I know gave up on it. You’ll see.” It was honestly such a bummer, but I’m glad those interactions happened because it kicked my butt into research mode.

After two babies in cloth diapers, I can tell you that cloth diapering is worth it! Yes, it can be a little gross (but as any parent of an infant will tell you, your level of being able to tolerate gross things GREATLY increases when you become a parent), and yep, it’s a little time consuming. But at the end of the day, there are so many benefits to cloth diapering.
So whether you’re just doing research on trying cloth diapering for your own little one, or if you’re a cloth diapering parent who wants to pull your hair out because it’s not working for your lifestyle, you’ve come to the right place! I’m going to try to break down for you how we cloth diaper at home, why we chose this route, and how we make it super simple and easy to maintain.
Note: Some links may be affiliate links. That means I may make a commission if you use my links to purchase, at no extra added cost to you! I only recommend products that I personally love and believe in. Full disclaimer here.

Cloth Diapering 101: How to Start Cloth Diapering
There are so many reasons why parents choose to cloth diaper, but ours were simple: we wanted to make less of an impact from a waste perspective, super sensitive skin runs in Hubby’s family, and honestly disposable diapers are expensive!
- Cloth diapering is SO MUCH CHEAPER, and results in so much less waste. 27.4 BILLION (yep, you read that right!) disposable diapers are used in the United States every year. When you think about how many diapers the average baby goes through in the first year, you’re looking at between $800-$1,000 spent on disposable diapers before your baby turns 1.
I don’t know about y’all, but we are doing everything we can to raise this baby on a budget, and when I read just how expensive disposable diapers can get I knew I wanted to look into other options.
Our family got started cloth diapering by spending just $100. I was encouraged by experienced cloth mamas to pick out a few different types and see what worked for us (and I highly recommend the same thing to other parents just starting out in cloth!).
We ended up loving pocket diapers, especially Mama Koala, Alva Baby and Bum Genius. They’re easy to put together, easy to clean, and the patterns are so adorable. Plus with Archer being so teeny when he was born, these were the brands that we found to be the most adjustable. I spent just $120 more to add 18 more diapers to our stash once we made this decision, and those diapers will last us through Archer being potty trained.
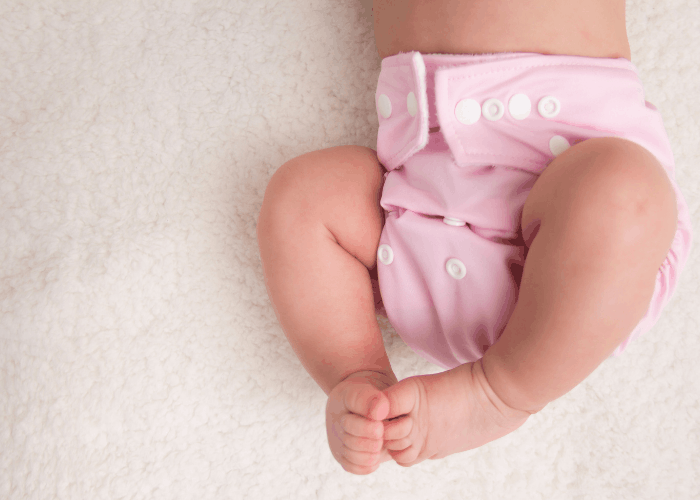
2. Cloth diapers are an amazing alternative for babies with sensitive skin! Super duper sensitive skin runs in my partner’s family. I’m talking Hubs skin is so sensitive that he can’t use most free and clear detergents. I started researching disposable diapers, and found that the majority of disposable diapers are made of dyes and chemicals that can be found to easily irritate sensitive skin. Many parents have also found that Little Ones with ultra-sensitive skin can also be more prone to diaper rash while wearing disposable diapers.
We saw this first hand when Archer got the stomach flu at 2 months old. We thought it would be easier to keep him in disposables and just change them frequently, but within 2 days his little tush was completely on fire, and the diaper rash just got worse from there no matter how dry we kept him or what diaper cream we used! As soon as he was over the stomach flu we put him back in cloth, and he hasn’t had a single rash since then.
3. And of course… they are SO stinking cute.
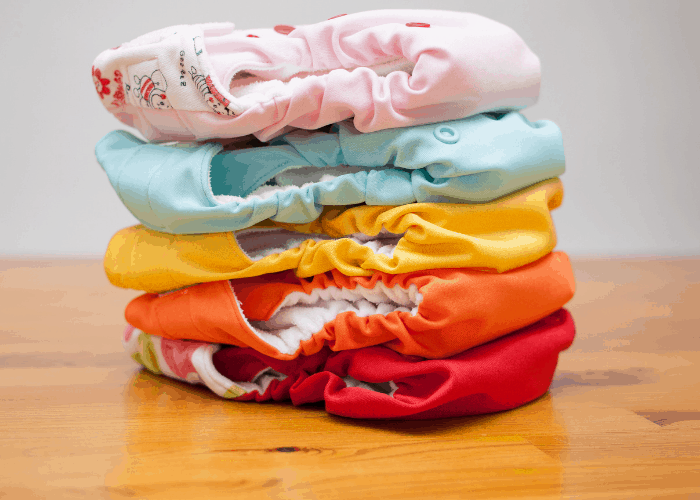
Cloth diapers come in literally hundreds of patterns these days. I’ll admit, I’ve purchased cloth diapers for holidays, special occasions… like for this mommy and me matching Halloween outfit!

How Does Cloth Diapering Work?
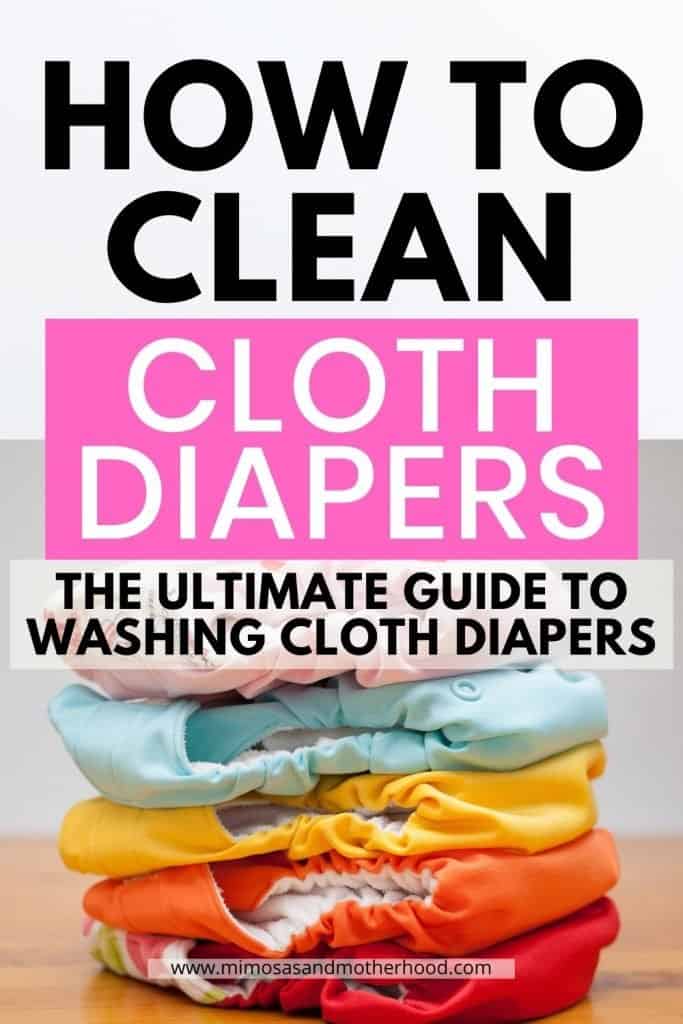
Cloth diapers have come so far! They’re no longer just the kind that you fold and pin. In fact, modern cloth diapers are just as simple to put on as disposables.
There are nearly a dozen types of cloth diapers available on the market today, which means that no matter your baby’s needs there’s a style that will work for him. Finding the right cloth diaper is the key to cloth diapering 101!
Here’s what you need to know about the most popular cloth diaper options before you get started.
Types of Cloth Diapers
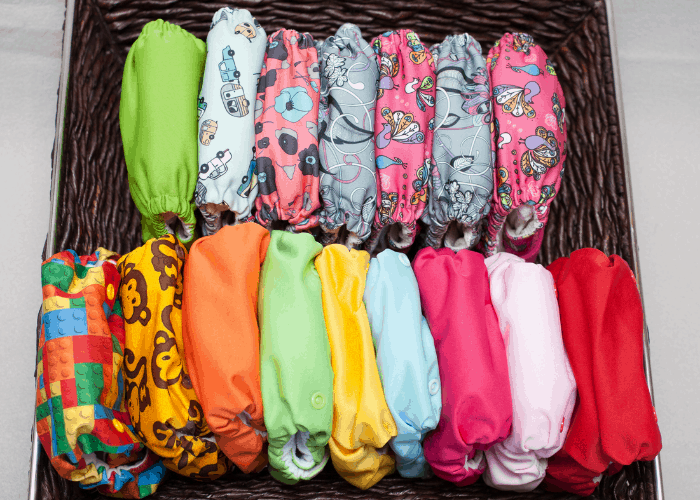
There are 4 main types of “modern” cloth diaper systems:
1. DIAPER COVERS (Shell)
Popular Brands: Blueberry, Thirsties
Notes: Diaper covers are a “shell” made of water resistant fabric. Diaper covers require any one of the cloth diaper “guts” from the section below and are a two piece system.
My Preference: Thirsties. This system the least expensive and most flexible, and super easy to clean. With covers you can use the same one multiple times during the day, just switching out the inner prefold liner.
2. POCKET DIAPERS
Popular Brands: Mama Koala, AlvaBaby, BumGenius, Thirsties
Notes: Pocket diapers usually come with an insert you slide in. You can also buy your own inserts or prefolds to stuff inside. A pocket diaper works like a pillowcase: there is an opening on one end and you stuff the insert inside.
My Preference: Mama Koala and AlvaBaby. Pocket diapers are my favorite system by far and our go to cloth diapering choice. I like the flexibility of being able to throw an extra liner inside for extra absorbency overnight, and they are so easy to clean! Both the Mama Koala & Alva Baby liners come with their own inserts, though you are able to mix and match inserts with liners. Pocket diapers seem to be one of the most popular diaper systems and there are a ton of options for patterns.
3. ALL IN ONE (AIO)
Popular Brands: BumGenius, Blueberry, Thirsties
Notes: All in ones or AIOs are considered the “premium” diaper, and their price reflects it. These are by far the easiest cloth diapers to use, as there are no steps to prep! AIO diapers are one piece, just like disposable diapers. They are usually more expensive than other cloth diaper systems (but still cheaper than disposables!) and take longer to dry. This system can be really nice for babysitters, relatives and your significant other who wants a quick diaper change without any other step with the diaper.
My Preference: BumGenius. I love the idea of the AIO but they take much longer to dry and are much more expensive, so they didn’t work for our family. If we could justify the expensive, AIO’s would be the way to go for us!
4. HYBRID // ALL IN TWO (AI2)
Popular Brands: GroVia, Charlie Banana, Thirsties
Notes: All in twos or AI2s are super similar to pocked diapers, but have a snap in liner. You have to use the particular brand’s liner with that brand’s diaper.
My Preference: I don’t have a preference with this system because I have never used it!
What do I need for cloth diapering?
The most basic part of cloth diapering 101 is making sure you have enough supplies. To get started with cloth diapering, you’ll need diapers and a few accessories. That’s it!
Babies usually go through 10-12 diapers every day. With this in mind, you’ll need two to three dozen diapers for the average newborn or baby. This will give you plenty to have on hand while you’re washing dirty ones.
You’ll need few cloth diapers as your baby gets older. If you’re interested in cloth diapering an older child, toddlers typically use six to eight diapers a day, and kids working on potty training kids need only about 4.
No matter which type of cloth diaper you use, know that babies usually go through 10 to 12 diapers per day; toddlers generally go through six to eight; and kids being potty trained usually only need up to four diapers a day.
Here are some great starter sets of cloth diapers you can snag on Amazon!
Cloth diapering is way easier if you also invest in a few accessories. I recommend at minimum a diaper pail for dirty diapers at home (before you dump them in the wash); a waterproof wet bag for storing dirty diapers on the go; and a diaper sprayer for rinsing solid waste off diapers and into the toilet.
How Do You Clean Cloth Diapers? Cloth Diaper Cleaning Tips
I get this question all of the time: what about cleaning cloth diapers? Isn’t it super hard and gross? It’s not, and that’s one of the best parts of cloth diapering 101.
I honestly think the fear of cleaning cloth diapers is what turns of the majority of folks out there. I’ll admit: when I first told my partner that I wanted to cloth diaper he said he was totally on board, but ONLY if it was easy.
Cleaning your cloth diapers doesn’t have to be super time consuming and gross! I honestly think the fear of cleaning cloth diapers is what turns off the majority of parents off from cloth diapering. As a parent who did full-time cloth diapering for nearly a year (and now we do part-time cloth diapering, since we have 2 under 2), I can tell you that your cloth diaper maintenance doesn’t have to be a pain!
I learned through trial and error the easiest way to clean cloth diapers. This method has worked well for every single parent I’ve recommended it to!
I’m going to break it down for your super simple how we clean our cloth diapers, and each step we take to make sure they come out stain free and fresh each time.
1. Pull the liner out of the diaper every single time you put a dirty diaper into the diaper bin.
When I change baby, I pull the inner liner from the pocket diaper every single time, and put both in the diaper pail. If there are solids I dumb them down the toilet, and also spray the diaper and liner with the SmarterFresh Sprayer before placing them in the diaper pail.
This is a really important step. If you don’t remove the liner prior to placing the diaper in the pail, you’re going to risk forgetting to remove it when you put the diapers in the wash. The cloth diaper liners HAVE to be removed before washing, or your diaper won’t get clean enough.
It’s also important to not skip using the SmarterFresh Sprayer after a poo diaper. It makes such a big difference with stains! If you’re worried about the spray, I recommend you also get the Spray Pal Cloth Diaper Shield. You can spray down the diaper directly in this shield.
Note: You can get the cloth diaper sprayer and the shield I recommend separately, but they are also now sold bundled together for a reduced price here!
2. Wash your dirty cloth diapers regularly, and don’t let them sit for too long.
We wash diapers every other evening, even if the pail isn’t full, for one big reason: when dirty cloth diapers sit for too long, they get super smelly and gross! The longer they sit while dirty, the tougher it is to get them sparkling clean.
3. Double check for stains before putting your cloth diapers into the washing machine.
I swear by an OxyClean soak for tough diaper stains! Simply mix a few tablespoons of OxyClean with warm water in your sink, and let your diapers sit for at least 4 hours fully submerged.
Related Posts: The Best Baby Walkers of 2021, Bottle Feeding a Breastfed Baby
How to Get Your Cloth Diapers Clean
Next up with cloth diapering 101: how to get your cloth diapers clean! And I’m talking really, REALLY clean. With the pocket diaper system, I simply pull out the inner liner from the pocket diaper and put both into the diaper pail. If there are solids I dump them down the toilet, or spray them off with the SmarterFresh Sprayer and then again put the diaper in the diaper pail.
We wash diapers every other evening. We dump the diapers into the machine, along with the reusable diaper pail liner (turned inside out) and follow these steps to get our cloth diapers clean:
1. Dump the diapers into the machine, along with the reusable diaper pain liner turned inside out. Double check that you’ve removed every liner from every diaper!
2. Do a plain rinse cycle with no detergent.
3. Set washer to normal warm cycle, and also select “presoak” and “extended rinse.” I throw in our regular detergent (we use Seventh Generation) and half a scoop of OxyClean. I let the diapers soak, then go through the regular cycle with an extra rinse just to be sure they’re extra clean.
4. Cloth diaper best practice says you should line dry cloth diapers… but tbh, how many modern mamas have time for that? So I throw our cloth diapers into the dryer on low heat.

What Do I Need to Get Started Cloth Diapering?
- Wondering how many cloth diapers you need? If you’re just starting out and trying cloth diapers, I recommend you snag enough to last for 1-2 days, so roughly 24-36 diapers. This is enough to get a feel for diapering, and many come in packs of 6. If you decide that cloth diapering is absolutely for you, I recommend enough cloth diapers to last you 2-3 days (ideally 25-30 diapers). Both AlvaBaby & Mama Koala have great “variety pack” options available on Amazon that are super inexpensive.
- Diaper friendly detergent. There are tons of recipes out there for homemade detergents, but what we found works best for us (and is easily snagged at the grocery store) is this Seventh Generation option. You want something that is going to rinse clean and does not have any dyes or perfumes.
- Wet bags! I recommend 3 travel ones. I keep one in our diaper bag, have one in his “daycare” bag, and a clean one just in case. These adorable ones are a great option!
- A diaper pail that can also hold a “wet bag” liner for cloth diapers. I personally use the Dekor Classic Hands Free Diaper Pail and I picked up an extra set of washable liners (which are basically big wet bags). Check the diaper pail out here, and the washable liners here.
- I also highly recommend a diaper sprayer (we use the SmarterFresh Cloth Diaper Sprayer), or disposable liners (which I haven’t tried, but a lot of friends recommend these). Both of these options will make cloth diapering so much easier on you! I also opted to get the Spray Pal Splatter Shield to cut down on gross things flying around our bathroom.
(Also important to note: you don’t use diaper cream with cloth diapers. Many creams can cause a build up film on the liner, which makes it less absorbent. Instead we use coconut oil, and to be honest we’ve never had diaper rash happen while using cloth. If you still really want to use a diaper cream, one that works great and is cloth diaper safe is Boudreaux’s Butt Paste.)
Cloth Diapering 101: Make it fun AND easy!
I absolutely love cloth diapering. It is already saving our family a ton of money, and I feel good knowing that we aren’t creating an insane amount of waste that is impacting the environment. Is it for everyone? Of course not! But if you’re on the fence about adding cloth diapering to your routine, I hope you’ll give it a try! Feel free to reach out to me with any questions as I’m always happy to help get more folks on the “fluff butt” train! =)
Experiment with what works for your own diapers, and if you found this cloth diapering 101 post helpful please take a minute to share!
